


What You Can Really Expect with the Solar PV Installation Process: Your Step-by-Step Guide
1,723 Views
Solar panel systems are now a more common sight in different areas, and for good reason. Solar PV installations have proven their worth for many property owners, and those who have made their own solar panel system investment can easily tell you that it is one of the best decisions they have ever made for their homes and properties. But if you have also made up your mind that you could well benefit from a solar panel system, the next step is to have it installed. If you are planning a solar PV installation, what can you expect from it then? Here’s what you can really expect with the solar PV installation process: your step-by-step guide.
Your options
Of course, as you may have already seen, the most common place for an installation is the roof. Many roofs in the UK have good specifications for solar PV installations when it comes to sunlight exposure, as confirmed by solar Manchester specialists like Atlantic Renewables. But another option for an installation is on the ground with the use of ground-mounted panels, and this often becomes an option if there is no room on the roof or if other buildings or obstructions block the roof.
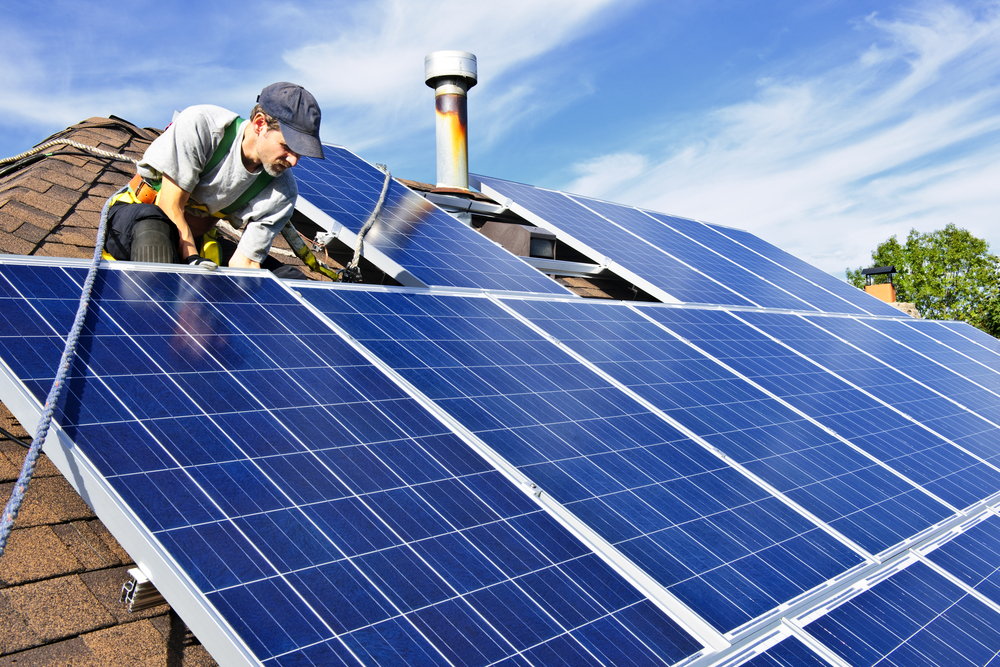
Solar PV Installation Process:
- The scaffolding and installation of the mounting system
The first step is the erection of the scaffolding, which ensures the safety of the installers during the process. Once this is done, they will set up the mounting system for the panels, which are designed to support the panels’ base. The structure has to be tilted at an angle from 18 to up to 36 degrees for maximum exposure to sunlight.
- The installation and wiring of the panels
The next step is the installation of the panels as soon as the mounting system is in place. The panels are placed on the mounting system or structure, and the installers will tighten all the nuts and bolts to secure the panels and ensure their stability. Afterwards, the installers will connect the panels to the electrical wiring. In many cases, they will use MC4 connectors since they are suitable for all kinds of panels.
- The installation of the inverter and battery
Once the wiring is done, they will connect the inverter to the system. Many installers choose to install the inverter near the main solar panel, although it could be either outdoors or indoors. In general, though, inverters work better if they are kept in a cool place.
Next, the inverter is connected to the battery; remember that the storage of the battery will save you a lot of worry about having enough usable energy when times are cloudy, so choose your battery’s storage wisely.
- The connection of the inverter to the unit
The installers will then connect the solar inverter to the unit so it can produce electricity. You should also note that the installer should connect a generation meter so you can monitor the actual amount of electricity produced by the solar panels.
After all is done, the installers will do a test on the panels and the entire system by turning on the power and checking that everything works and is properly connected. You can then enjoy your new solar installation and reap the best rewards.